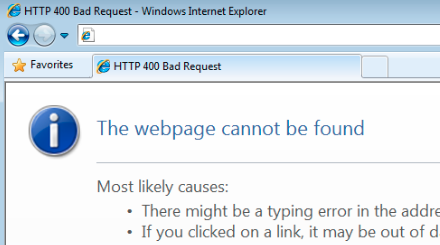
Solved: Error 400 browsing web page

Error 400

You’re browsing a website in your organisation and some internal users are getting an ‘error 400’ error.  There doesn’t seem to be any commonality between people that are and aren’t getting the problem.  This one can be quite frustrating and not easy to troubleshoot.  You sometimes can work out that it’s typically users that’s been with a company for a while but not always.  What I’ve found to be the culprit in most cases is an easy fix.

Where there is a large number of Active Directory groups you may come across this issue before. Hence why it’s normally happening with people with the company for a while, because of their longevity they’ve been added to lots of groups over the years and not been removed.  It could also be new users like personal assistants or secretaries because they belong to a lot of groups, or even more likely, IT staff that are in a lot of groups as well as their equivalent development/UAT/testing groups.  It can depend a lot on the environment you work in.

327825 Problems with Kerberos authentication when a user belongs to many groups

The Fix:

An easy fix is to add the two entries below to HKEY_LOCAL_MACHINE\System\CurrentControlSet\Services\HTTP\Parameters on your IIS server and reboot.

Name Value Type Value Data 
 MaxFieldLength  DWORD  65534
 MaxRequestBytes  DWORD  16777216

This does allow http.sys to use more memory though and performance should be monitored, especially in large user environments as well as any security precautions that should be considered.

Another way around error 400 when it’s caused by group membership, is to limit the groups that each user has.  You may already know the pain though and how difficult this can be in large organisations. Especially where there are multiple IT departments or groups that have access to Active Directory changes.

Solved: remove “press home” to unlock iphone

iphone Home button

One big change in Apple’s IOS 10 is the removal of the swipe unlock. Now to get into your device, you get the “Press Home to Unlock” to get past the Lock Screen.

If you have fingerprint authentication configured, you can change back to have your device unlock just by resting your finger at on the home button like before.

How To turn of the “press home to unlock”

  • Open the “Settings” app and go to “General” and then to “Accessibility”.
  • Choose “Home Button”.
  • Find the setting for “Rest Finger to Open” and change this to the ON position.

Now just rest your finger on home and in you go. Its the little things that make it your phone 🙂

Enable fingerprint unlock on iPhone/iPad

fingerprint

I get so many people that still don’t know about the fingerprint security feature on iPhone 5S and later.  I figured it’s time for a post on how to setup touch ID for those that didn’t do it during the setup assistant.

You still need your passcode for times when your device updates and reboot it’s or when you lose power the next boot up of your phone will need your passcode.

  • Go to Settings > Touch ID and passcode > Input your passcode.
  • Tap “Add a fingerprint”.
  • Press one finger on the home button and hold it until you feel the vibrate.
  • Keep tapping and change the angle slightly
  • It will keep asking until the phone has the detail it needs to be able to read your finger print in different positions
  • You’ve got 5 fingers you can set, (unless you do the more than 5 workaround) not necessarily all yours. Someone else in the family can be added to unlock your phone.

How does the fingerprint reader work?

The home button is made from Sapphire crystal which is one of the hardest, clearest materials known. Underneath is a high-resolution 500  sensor that is able to read the details of a fingerprint fine enough to get the accuracy needed.  Apple doesn’t actually store images of your fingerprint. The Touch ID feature stores a mathematical representation of your finger, so it isn’t possible to reproduce an image.

Is it Secure?

According to Apple.

“Every fingerprint is unique, so it is rare that even a small section of two separate fingerprints are sufficiently alike to register as a match for Touch ID. The probability of this happening is one in 50,000. This is much better than the one in 10,000 odds of guessing a typical four-digit passcode.”


Performance increase for older MACs

keyboard typing

From time to time the performance on my old MAC slows down a little and doesn’t seems like it’s working like it’s old self.  I guess it is a few years old but it still does the job I need it too. I just need it to run the best it possibly can.  I’ve found two really easy way to speed things up again. It’s a bit techie for most but just follow the instructions and you’ll have yours running fast again in no time.

First up is  a PRAM reset. It might solve some of the strange problems you’ve been having.  What to do:

  • Shut down your Mac.
  • Get ready by finding the following keys on the keyboard: Command (⌘), Option, P, and R. You will need to hold these keys down in the last step
  • Turn on the computer.
  • Press and hold the Command-Option-P-R keys before the gray screen appears.

Keep holding them until it restarts and you hear the startup sound again.

Release the keys and see if you MAC is running any better.

SMC Reset (especially good for power and performance)

Second thing to try is an SMC reset. I’ve found this one especially good if you have a MACbook that is doing some strange power things like not fully charging or losing power quickly.  Good if you aren’t seeing the same kind of performance you used to have too.

  • Shut down your Mac.
  • Plug in the power adapter to a power source and to your Mac.
  • On the built-in keyboard, press the (left side) Shift-Control-Option keys and the power button at the same time. (it should NOT boot) but the LED light on your charging adapter may change.
  • Power on the computer.

Let it start up and you should notice your MAC book back to it’s old self.

Backup time! Top 6 tips so you don’t lose everything

backup button banner

Backup, It’s a boring topic isn’t it.  You don’t see any fun graphics. You don’t get some cool picture or video to share on Facebook. No kind of achievement or bonus points.  What you do get is peace of mind knowing, you have your backup, your data is safe . . .  or is it?

I know so many people that *think* they have their backups all under control but when you think about why you do a backup, is it?

Already backing up to an external hard disk, time machine, CD or DVD? You’re ahead of most people!  But where are you storing them? Are you checking them regularly? Media like CDs don’t last forever and in some cases, no more than a year or two.

Make your backup regularly

No matter how you do it, make your backup regular.  If you are using third party software to do the backup, schedule it so it happens regularly without even thinking about it.  Just make sure you check from time to time that it’s working and if you need to, clean out those old backups that you don’t need.

Keep them in a different place

“But I have a great backup regime and do it every day, see I’ve got them all right here . . .”

Doing a backup is one thing, and that’s awesome that you are thinking about it. Having your backups sitting right next to your computer or on another drive on the same computer only protects you if something happens to a file, corruption, accidental deletion etc. If your house burns down or floods, those backups are likely to be no good.  If you are backing up to the same drive on a coputer and the hard disk fails, you’ve got nothing to recover from.

Remember to keep your most important files off site, somewhere else.  you don’t need your whole system, just those spreadsheets, tax records and documents that are important. how much you backup is up to you.

You could try online backups to the cloud from places like DWdrive or dropbox. These kind of services can help you keep things off site without even thinking about it. You could even virtualise your desktop using their cloud services and have everything offsite but still accessible from anywhere.

Apple has done a lot with Time Machine to make thinking about backups simple but having a time machine device in your house still has those same disaster scenario issues.  If your house is gone, so is all your data.

Share your backup with friends

This one kind of comes back to the previous tip about getting files off site.  One easy way to keep files offsite is to have a spare external hard drive to backup to and have your friend do the same.  You can then backup and swap drives regularly. *See the next point about encryption!

Encrypt your backup

Swapping disks with friends is great,  but you know they are going to snoop!  Try using something like TruCrypt to encrypt your backups. This way, only you will be able to get into those files that are so important that you need to keep them offsite. Just don’t forget the password or key you need to unlock it.  Trust no-one!

Use reliable media

A family friend recently had a thesis due that would finish off her degree at university.  She was keeping it on a USB drive and taking back and forth between computers at school, home , everywhere.  Something not that many people are aware of is that USB flash drives are really only reliable for a certain number of read and writes.  It’s typically a lot! Depending on the quality, it could be a few tens of thousands or a few million,but at some point it’s luck that keeps them alive.  Anyway, hers died.  It was Friday and the paper was due on Monday. It was the only copy. She was a mess and had to rewrite a thousand pages in a weekend, from memory.

Please, if you do nothing else as a result of reading this post, make sure you backup your data that you have on USB keys.

The other thing a lot of people  don’t think about is the reliability of CD and DVD disks.  These can also vary in quality a lot and that margin 10 pack of disks you got for a buck probably won’t last more than a couple of years.  For most people that might be enough though and you’ll have done a lot more backups by the time they fail.  Just keep in mind that if you want to keep CDs andDVDs as long term storage media,  buy quality.  You can even get special archiving disks if you need to store data that way.

Test your backup. Try restoring something (to somewhere else)

It’s a good idea to regularly check you can still read and get to data on your backup media. Just to be sure that the media is still OK and hasn’t failed. It’s a good opportunity to go through what you have and if you don’t need it anymore you can do a bit of a clean out.  Just make sure you really don’t need it.  Also,  don’t test restore something over the top of existing files.  You could end up overwriting more recent things and lose copies of files you haven’t backed up yet.

So there’s a few tips I have on backups.  Hope they are useful and it’s got you thinking about your data and how you’d go in a disaster.